002 Getting started with Rust and Zola
Let’s install Rust
I’m currently on a Windows machine (64 bit) and I just installed the appropriate version of rust on this website.
After reading the website I’ve learned that running this command updates your rust version.
rustup update
It also mentions that there’s a 6 week rapid release process.
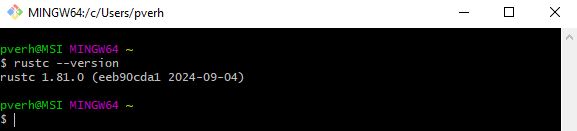
Lets verify if Rust is installed properly by running the following command:
rustc --version
Rust seems to have been installed properly.
Apparently you can also uninstall rust in the CLI b y running:
rustup self uninstall
Quoting the website: In the Rust development environment, all tools are installed to the ~/.cargo/bin directory, and this is where you will find the Rust toolchain, including rustc, cargo, and rustup.
Setting up a Static Website
To host my articles, I’ve decided to set up a static website. Since I’m learning Rust, I want to use it in this process to familiarize myself with the language. In the past, I’ve used Hugo (which runs on Golang), but this time I’m opting for something Rust-based.
A Static Website Framework
I’m somewhat familiar with the JAMstack, which stands for JavaScript, APIs, and Markdown—a concept that gained popularity through platforms like Netlify. The idea of a static website is appealing. It’s an easy and cheap way to deploy a simple website such as a blog.
After some research, I found Zola, a static site generator written in Rust, which seems to be the comparable for as Rust as Hugo for for Golang users.
Installing Zola on Windows
Following this website, I followed the Windows installation instructions using Chocolatey.
Small sidenote: I did have to run Git Bash as administrator in order to get it to install.
Starting a new project with Zola
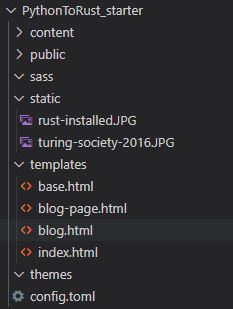
zola init PythonToRust
Following the documentation you get a pretty basic website. It’s pretty straightforward and I did not run into any surprises. You’ll end up with something like this if you’ve followed the documentation on getting started:
We can build and run the website by running the following commands:
zola build
zola serve
The first thing that you notice after building and serving the website: there’s no styling whatsoever. It’s pretty barebone right now. I am, by no means, good at design nor front-end web development. Let’s see if we can pick a nice theme that will provide us this out of the box.
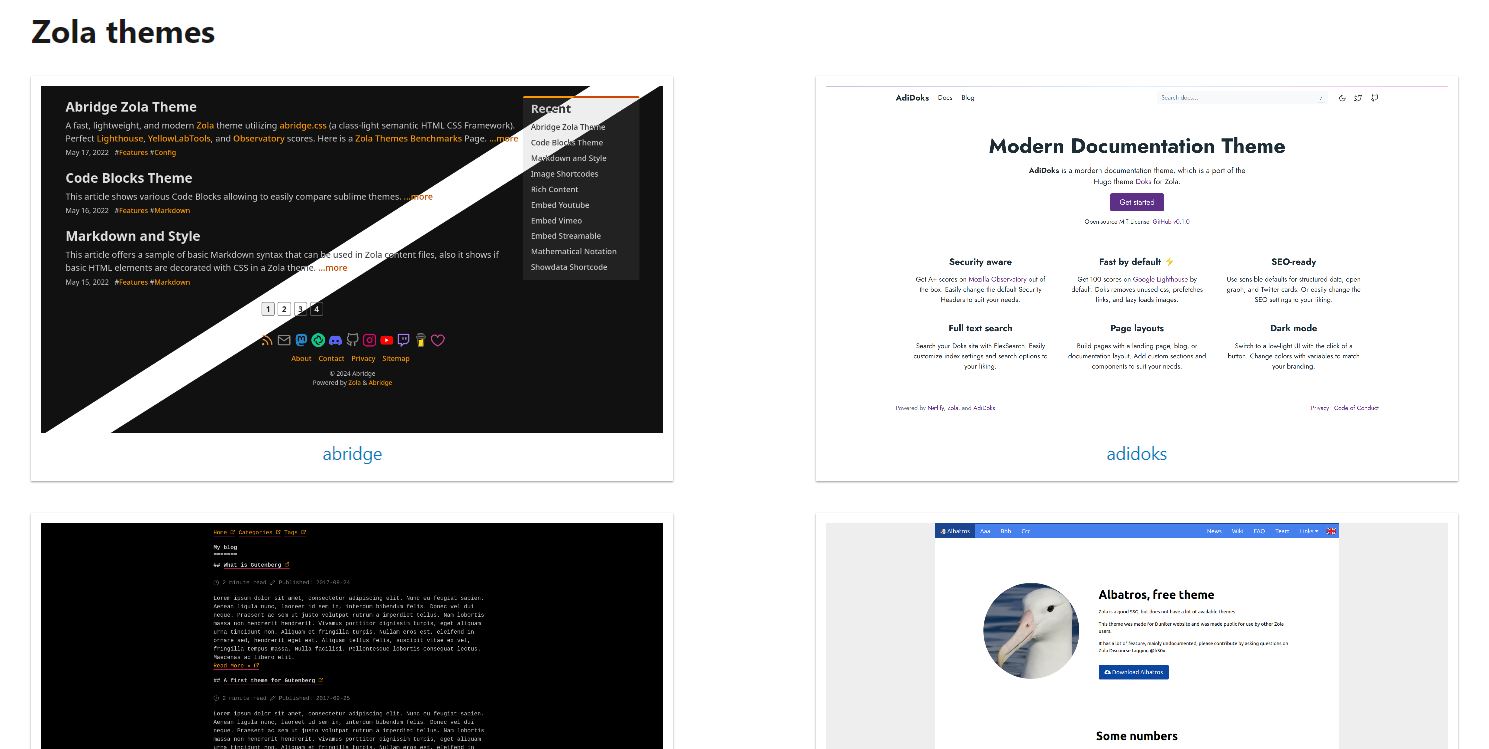
There’s quite a few nice themes already provided here.
Visiting the website you’ll see pretty much something similar to this:
After some browsing I came across the boring theme that you can find here. It looks pretty simple, there’s a neat little toggle for light and dark mode. It has some nice styling out of the box. I can work with this.
Boring: A Zola theme
I’ve added a link to the demo here, but I can imagine (if I don’t change it too much) that this blog is a demo example as well. The README.md suggests adding it as a git submodule under themes/boring, which makes sense to keep up to date with updates to the theme and keeping the theme separate. I, however, will be using it as a main theme and just copying the repository as is, I might change some things in the future. I can imagine changing the homepage for sure, the styling I do want to keep as is.
In order to build the CSS files, the theme makes use of yarn. I know that it’s a package manager and there’s another one called NPM, but much more than that I did not know. I decided to ask our new best friend to give me some simple explanations. ChatGPT mentions the following: “Yarn and NPM are both package managers for JavaScript. They help you manage your project’s dependencies (other people’s code that you use to build your project). Think of them like tools that fetch and organize all the ingredients (libraries and packages) you need to cook up your app.”
Building the CSS files
In order to build the CSS files the README.md advises to run the following commands:
yarn install --frozen-lockfile
This installs the dependencies listed in the package.json file by fetching them from the internet and putting them into the node_modules folder. This flag ensures that Yarn uses the exact versions specified in the yarn.lock file. If there’s a mismatch between the package.json and yarn.lock, Yarn will throw an error instead of updating the lockfile. It guarantees that the versions installed are exactly the ones already locked.
yarn build
This command typically runs a build script defined in the package.json file (under the scripts section). The build process could include tasks like compiling CSS, JavaScript, or other assets. This does build or css file as you can see in package.json under scripts it has defined build as: “npx postcss css/style.css -o static/css/style.css”. This outputs the style.css file that the theme uses for styling.
Seeing it all come together
We can start up the website again after a quick build and serve:
zola build
zola serve
And the result so far (work in progress):
Join the Journey Ahead!
If you're eager to continue this learning journey and stay updated with the latest insights, consider subscribing. By joining our mailing list, you'll receive notifications about new articles, tips, and resources to help you seamlessly pick up Rust by leveraging your Python skills.